Setting up your design
Room System
Firstly, what kind of design are you about to create - kitchen, bathroom or bedroom/study? To select your type of design (or Room System) click 'File' - 'Select Room System'.
Firstly, what kind of design are you about to create - kitchen, bathroom or bedroom/study? To select your type of design (or Room System) click 'File' - 'Select Room System'.
Select the room system and click 'OK'. It will take a few seconds to implement a change.
This Design (Menu)
Before starting your design there are certain options you may wish to change. These are found under 'This Design - 'Room Settings':
Before starting your design there are certain options you may wish to change. These are found under 'This Design - 'Room Settings':
The room settings depend on the current room system. The three examples below present (from top to bottom) the room settings dialog boxes for kitchens, bathrooms and bedrooms.
Room Settings for the kitchen, bathroom and bedroom/home study Room Systems
Tall Base Units refers to the height of Larders, Fridge Housings, Oven Housings etc, in your design. As a general rule, if you are using small Tall Base Units you would also use small Wall Units to ensure a consistent gap between the worktop and the bottom of the wall units. Likewise for medium, tall and extra tall units. Details on changing the pre-defined heights can be found in Changing Defaults.
Before starting you need to specify the default tiling height (not applicable to Bedroom/Home Study designs). Turn tiling on by ticking the 'Tiled' box, and choose your heights to tile from and to. The tiling specified here will be applied to all the wall components used when drawing your room. Set it to whatever the majority of the design should have. You can alter the tiling for the rest of the walls later by editing the wall components.
The 'Doors Have Frames' option controls whether cabinets are drawn with 'plant-on' or 'In-frame' style doors. See Door Frame Type on the Utilities Window.
With the exception of the tiling option, you can change any of the properties found under 'Room Settings' as you are doing your design and it will update the design to the new settings.
Door Type
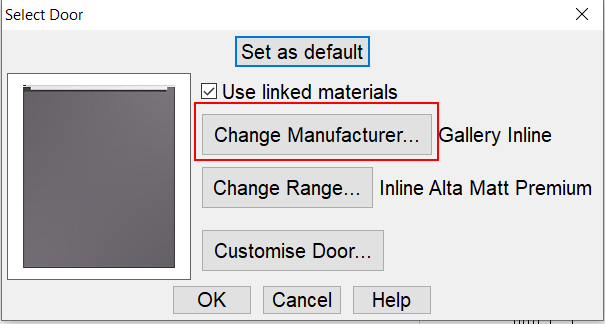
To change the manufacturer click 'Change Manufacturer'.
This presents a list of the door manufacturers installed on your system. Click on the one you wish to use and click 'OK'.
Once you have selected a manufacturer you can now select the range by clicking 'Change Range'.
To select a range, click on the description.
Once you have selected a range, you can now click 'Customise Door' to pick the handles.
You can now select a handle and handle location for each door type. To change the handle, select the door type from the 'Door Type' drop down box.
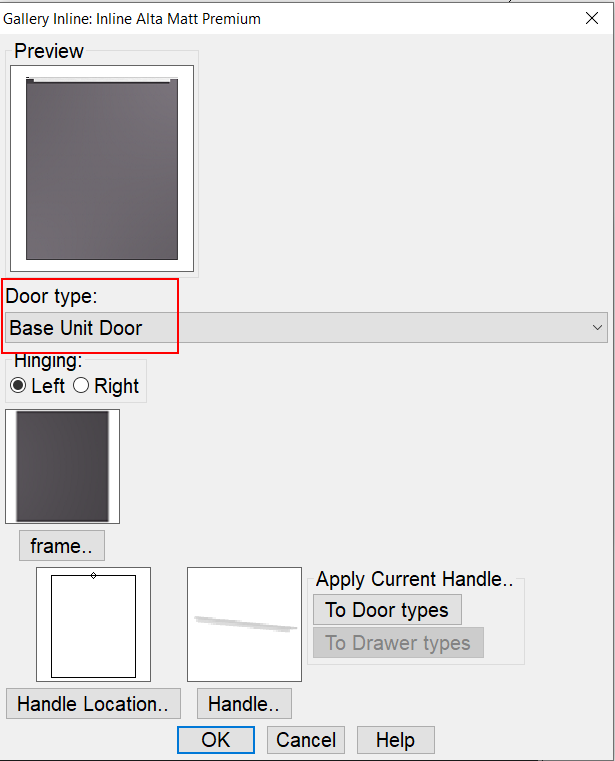
The 'frame...' button allows you to select manufacturer feature frame doors.
The handle location will change depending on the door type. Repeat for the other door types.
Then select the handle ('Handle..' button).
Apply current handle allows you to apply the current selected door handle to all the doors or drawers in the design.

NOTE - You can return to the 'Door Type' section whilst doing your design, or once it is complete. You do not need to change the range or all the handles etc before starting the design. Any changes made will update your current design.
Client Details
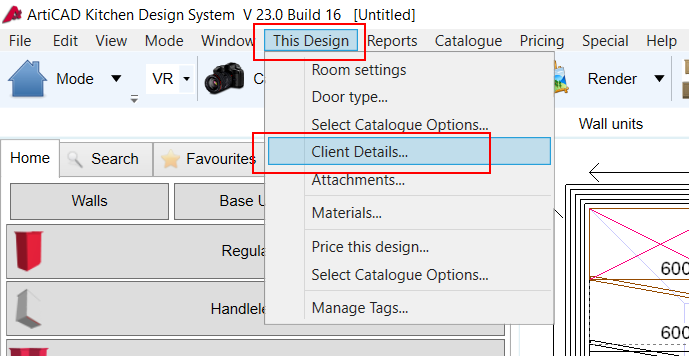
This is where you can input your client's details. The fields presented depend upon the room system you have selected (above is from the Kitchen room system).
The details are stored with the design and can be automatically placed onto your print outs - see
Creating Page Layouts.
Attachments
The 'Attachments' window allows you to specify the profile of your worktop edging, cornice, pelmet and plinth, etc.
Select the item you wish to change. It will show you the currently selected profile. Press 'Change...' to see the available profiles.
Select the new profile by clicking on the button with the profile name on.
NOTE - The profiles available vary between room systems. Cornice, Pelmet and Plinth have a special hidden option. This removes cornice/pelmet/plinth from all the units in your design. You can change the attachments at any time while you are designing and it will update your design.
Now your design has been set up you can move on to drawing your room.
Related Articles
Setting up your BathCAD design
Before starting your design there are certain options you may wish to change. These are found under 'This Design' - 'Room Settings': ‘Tall Base Units’ refers to the height of tall units in your design. As a general rule, the distance between the top ...Setting up your BedCAD design
This Design (Menu) Before starting your design there are certain options you may wish to change. These are found under 'This Design - 'Room Settings': The ‘Doors Have Frames’ option controls whether cabinets are drawn with ‘plant-on’ or ‘in-frame’ ...Viewing your Design (BathCAD)
This chapter covers the various options for viewing your design. Elevation An elevation view will show you everything touching a selected wall run. Units have to be touching the wall to appear in the elevation. If you elevate a wall and units you ...Viewing your Design (BedCAD)
This chapter covers the various options for viewing your design. Elevation An elevation view will show you everything touching a selected wall run. Units have to be touching the wall to appear in the elevation. If you elevate a wall and units you ...Viewing your design
This chapter covers the various options for viewing your design. Elevation You can elevate all units sitting flush against a wall. If you elevate a wall and units do not appear as you’d expect, check that they are locked against the selected wall. To ...