Lighting Your Design
This chapter will explain how to alter the lighting in your design. Altering the lighting in your design can dramatically improve the finish of your photo-realistic images - the amount of light required will vary from design to design. It is up to you as the designer to apply them to your particular design and create the lighting setup that you feel is the best for your design.
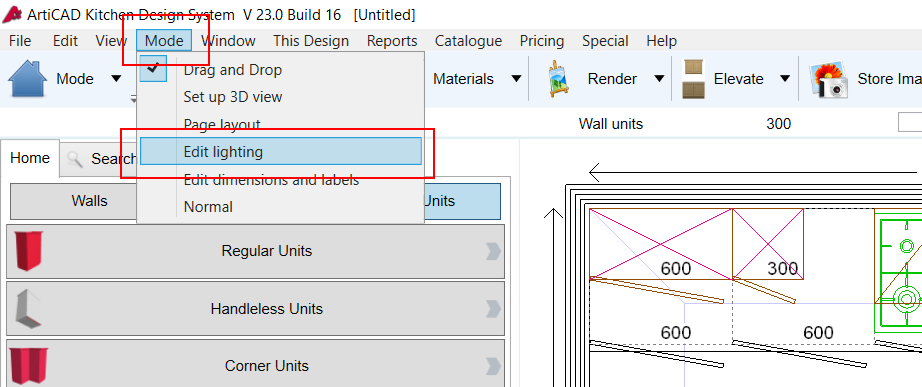
Click 'Mode' - 'Edit Lighting'. You can edit your lighting any time after completing the 'Walls' layer in your design.
Editing an Existing Light:
Double left-click on the light you wish to edit, or click on it to select it and press F1.
Creating a New Light:
Single-right click where you wish your new light to be created, and click on Add new light. New lights are spot lights (see 'Different light types' below). Edit the light to change the type.
Moving a Light:
Hold down the left mouse button and drag the light into its new position.
Deleting a Light:
Single left-click on the light you wish to delete. A black box will surround the selected light. Press the 'Delete' (sometimes 'Del') key on your keyboard. When prompted click 'Yes' to confirm you wish to delete the selected light.
Grouping Lights In Your Design:
Similar to Drag and Drop. If you hold down left click and drag your mouse at the same time it creates a grouping box. O
nce all the lights are selected you can press F1 to Edit all the selected lights.
Deleting All the Lights In Your Design:
If you wish to remove all the lighting in your design and start again, click 'Edit' - 'Delete all lights'. When prompted click 'Yes' to confirm you wish to delete all the lights for this plan.
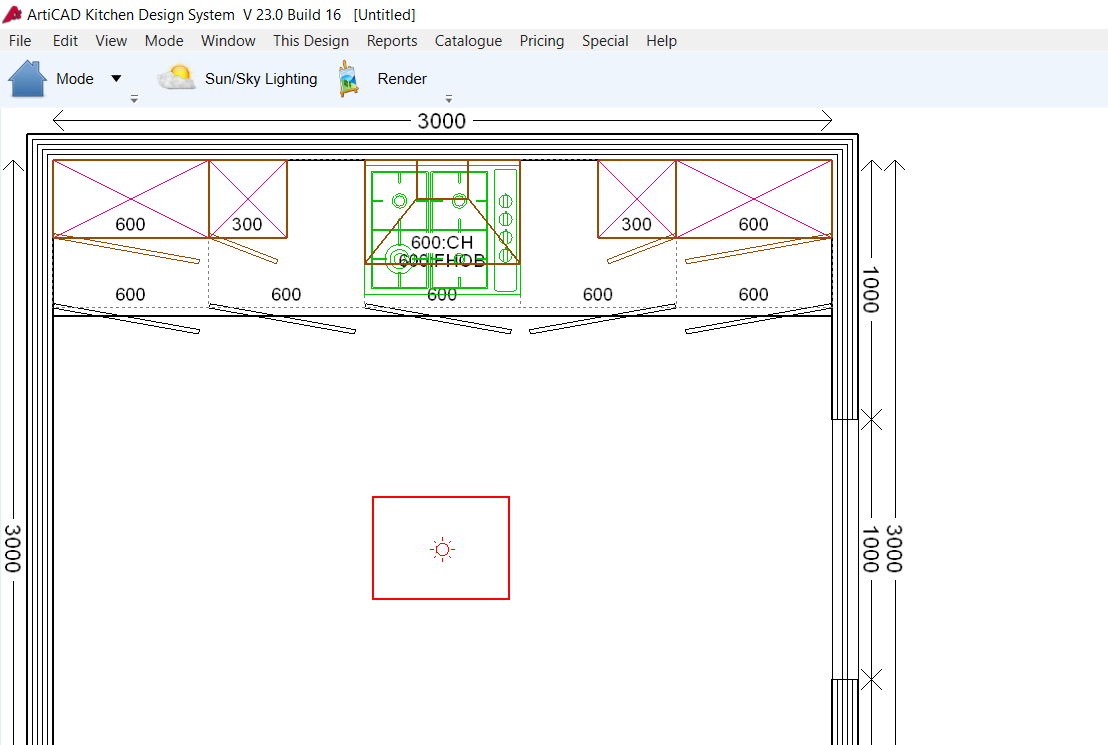
The Default Light
The default light is added automatically by ArtiCAD.
The position of the default light is the centre of your design. It is a point source at 100% intensity at ceiling height (see 'The different light types' for more detail). If you delete all the lighting in your design ArtiCAD will re-create this default light. You can edit and move this light exactly the same as any other light in your design.
If you add more than one point source in the design, make sure the intensities add up to 100%. If you have two or more point sources all at 100% intensity it can bleach out the design with light.
The Different Light Types
Spot
A spot light produces a cone shaped beam of light. A real world example would be a downlight under a wall unit. The width of the cone can be varied. The direction the light is shining in can also be changed.
By default, the spot light shines from the ceiling straight down onto the floor.
To change where the light is shining to on your design, hold down the right mouse button on the light source and drag to the desired location. In the above example the light is shining from the light source towards the side of the cabinets.
Intensity:
The strength of the light source defaults to 100%

NOTE - This is percentage (%) not wattage
Colour:
The colour of the light produced by this light source. Click 'Change...' to select the desired colour from the palette. Defaults to white.
If Location Coincides With a Wall Unit: If the position of this light source coincides with that of any wall unit in your design, the height of the light source can be set based on the selection from the list. Defaults to 'Place light under unit, shining down' (i.e. like a downlight mounted beneath a wall cabinet)
Light Location:
The position on the light source, in millimetres, from the origin of the design. Can be used to specify the exact location of the light source, however it is easier to simply drag the light into position.
Height Above Ground: The height above the ground from which the light originates. If you need to specify a height you must also select 'Do not alter height', otherwise the light source will default to the ceiling height of this design.
Height Above Ground: The height above the ground from which the light originates. If you need to specify a height you must also select 'Do not alter height', otherwise the light source will default to the ceiling height of this design.
Point Source
The point source is the default light that is included in the start of every ArtiCAD plan. This is artificial lighting and is used for the purpose of Virtual reality and photo-realism renders - point sources do not need to be used in HD renders.
To turn a point source off, double click on it. In the properties menu, set the intensity to 0.
NOTE - Deleting the point source from the lighting section may not remove it.
Related Articles
Lighting Your Design (BedCAD)
This chapter will explain how to alter the lighting in your design. Altering the lighting in your design can dramatically improve the finish of your photo-realistic images - the amount of light required will vary from design to design. It is up to ...Lighting Your Design (BathCAD)
This chapter will explain how to alter the lighting in your design. Altering the lighting in your design can dramatically improve the finish of your photo-realistic images - the amount of light required will vary from design to design. It is up to ...HD Lighting and Rendering
Version 22 features a new lighting renderer that allows you to adjust your lighting more easily to produce much higher quality, more realistic HD images. Lighting is very subjective and therefore we recommend that you practice until you find lighting ...HD Lighting and Rendering (BathCAD)
Version 22 features a new lighting renderer that allows you to adjust your lighting more easily to produce much higher quality, more realistic HD images. Lighting is very subjective and therefore we recommend that you practice until you find lighting ...HD Lighting and Rendering (BedCAD)
Version 22 features a new lighting renderer that allows you to adjust your lighting more easily to produce much higher quality, more realistic HD images. Lighting is very subjective and therefore we recommend that you practice until you find lighting ...